

7 Steps to Patch Test Botanical Scalp Oil Safely
Editorial TeamLast Updated: November 4, 2026
Quick Summary
To patch test scalp oil, apply a grain-of-rice amount of the finished blend to your clean inner forearm or inner elbow, leave it uncovered, and check at 15 minutes, 24 hours, and 48 hours. Test the exact strength you plan to use on your scalp, and stop at the first sign of a real reaction.
- Wash the test area with mild soap and water, and never test on broken skin, a cut, a rash, or eczema.
- Spread the oil thinly over an area roughly the width of a coin and leave it uncovered so skin can breathe.
- Leave the patch test on for 24 hours before your first full check, then check again at 48 hours.
- Irritation shows up fast and stays where the oil sat, while allergy tends to appear a day or two later and spread.
- Stop using the product at the first sign of a real reaction, wash with mild soap and cool water, and do not re-test.
Table of Contents
- Why a Patch Test Matters Before Any Botanical Scalp Oil
- What You Need to Patch Test Hair Products at Home
- Step 1: Choose the Right Test Area and Prepare Clean Skin
- Step 2: Apply a Small Amount of the Finished Oil
- Essential Oil Dilution for Scalp: What a Safe Test Concentration Looks Like
- How Long to Leave a Patch Test On Before Checking
- Scalp Oil Allergy Symptoms: Irritation vs Allergic Contact Dermatitis
- What to Do If You React, and When to Get Professional Advice
- Frequently Asked Questions
Why a Patch Test Matters Before Any Botanical Scalp Oil
A patch test is a small, controlled application of a product to a safe area of skin before you use it on your scalp. It tells you how your skin reacts to that specific formula. This guide walks you through how to patch test scalp oil safely, step by step.
Here is the part most guides get wrong: they tell you to test a single essential oil. But your scalp oil is a finished blend. It contains carrier oils, essential oils, and other ingredients mixed together. That mix is what touches your scalp. So that mix is what you should test.
Your scalp is also thin and sensitive. It sits close to your hair follicles, and it absorbs what you put on it. A reaction there can cause redness, itching, and flakes that take days to settle. A patch test gives you a warning first, on a small area, before the stakes get higher.
What You Need to Patch Test Hair Products at Home
You need very little to test hair products at home. The key is keeping everything clean and simple.
- The finished botanical scalp oil, at the strength you plan to use
- A cotton swab or clean fingertip
- Mild soap and water
- A timer or phone
- A notebook or notes app to record what you see
- A mirror for hard-to-see spots
Skip anything that adds variables. Do not test right after a hot shower, when skin is flushed. Do not apply other products to the test area. One product, one area, one clean test.
Step 1: Choose the Right Test Area and Prepare Clean Skin
The best test area is the inner forearm or the inner elbow. Both are thin-skinned and easy to watch. The area behind the ear works too, but it is harder to see and easier to rub by accident.
Wash the area with mild soap and water. Pat it dry. Check that the skin is clear.
Do not test on broken skin, a cut, a rash, or a patch of eczema. Damaged skin reacts faster and tells you nothing useful about your scalp. Wait until the area has healed.
Mark the spot in your notes so you can find it later. A small circle drawn with a pen near, not on, the test area helps.
Step 2: Apply a Small Amount of the Finished Oil
Use a small amount, about the size of a grain of rice. A cotton swab gives you the most control. Spread it thinly over a small area, roughly the width of a coin.
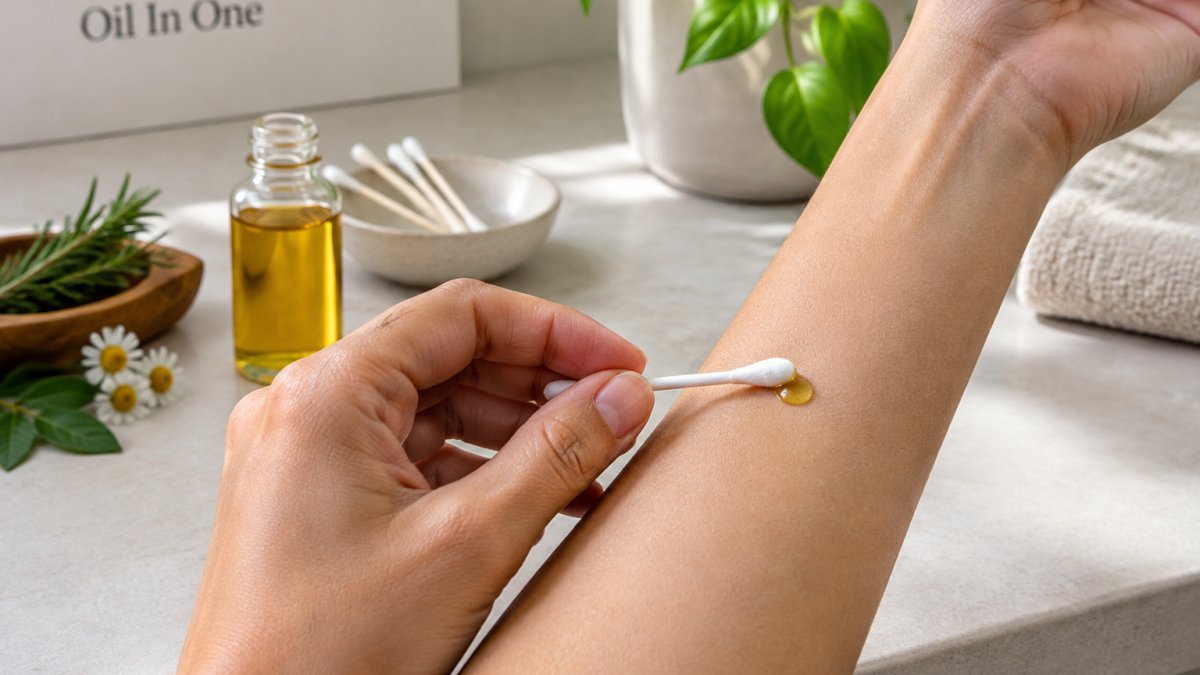
Leave the oil uncovered. Do not rub it in hard or wrap it. Let the skin breathe so you can see the true reaction.
Watch out: applying too much oil or covering the area traps heat and can cause redness that looks like a reaction when it is not. Keep the test thin and open.
If you are new to botanical oils, it helps to know the common natural oil mistakes people make before you apply anything to your scalp.
Essential Oil Dilution for Scalp: What a Safe Test Concentration Looks Like
Essential oil dilution for scalp use means mixing a few drops of essential oil into a larger amount of carrier oil.
Patch test scalp oil at the strength you will actually use it. If you plan to apply it neat, test it neat. If you plan to dilute it, test the diluted version. Testing a weaker mix than you will use tells you nothing.
If you are building your own blend, rosemary essential oil for hair growth covers safe methods and how to dilute it properly. Never test an undiluted essential oil on your skin. That is a different, much harsher test.
How Long to Leave a Patch Test On Before Checking
Leave the patch test on for 24 hours before your first full check, and check again at 48 hours.
Here is a schedule to follow:
| Time | What to do | What to look for |
|---|---|---|
| 15 minutes | Quick glance | Strong burning, swelling, or hives |
| 24 hours | First full check | Redness, itching, small bumps |
| 48 hours | Final check | Delayed rash or spreading redness |
Some reactions are delayed. A product can feel fine at 15 minutes and cause a rash a day later. That is why the 48-hour check matters. Do not wash the area during the test unless you have a strong reaction.
Scalp Oil Allergy Symptoms: Irritation vs Allergic Contact Dermatitis
Scalp oil allergy symptoms fall into two groups: irritation and allergic contact dermatitis. They can look alike on the surface, but they behave differently, and the difference changes what you should do next.
Irritation (irritant contact dermatitis) is a direct, non-immune reaction to a substance. It happens because something in the oil is too strong, too concentrated, or left on too long for your skin. It usually starts soon after contact, minutes to a few hours, and it stays inside the area where you applied the product. Typical signs are burning, stinging, tightness, and redness with a clear edge that matches where the oil sat. Strong essential oils applied neat, a blend mixed at a higher dilution than your skin tolerates, or a thick layer left uncovered can all trigger it.
Allergic contact dermatitis is an immune response. Your immune system has to recognise the substance as a threat, which is why it is delayed. The first exposure may cause nothing at all. On a later exposure, a rash can appear 24 to 72 hours after contact, and it can spread beyond the test spot to skin that never touched the oil. Signs include redness, swelling, itching that builds over time, small blisters, oozing, and a rash with a less defined border. Once you are sensitised, even a tiny amount can set it off again.
A simple way to read your own test:
- Timing: irritation shows up fast; allergy tends to show up a day or two later.
- Border: irritation usually stops where the oil stopped; allergy often creeps past it.
- Repeat exposure: irritation may settle if you use less or dilute further; allergy usually gets worse with each contact.
- Feel: irritation is more burn and sting; allergy is more itch and rash.
Common signs to watch for on the test area:
- Redness that spreads past the test area
- Itching that gets worse over time rather than settling
- Burning or stinging that starts within minutes
- Swelling or raised bumps
- A rash, flaking, or small blisters
Watch out: a home test can suggest which pattern you are seeing, but it cannot diagnose either condition. If the reaction is spreading, blistering, or keeping you awake, stop testing and treat it as a medical question rather than a product question.
If you are reacting and want to know which botanicals calm an itchy scalp, our guide to the best oil for itchy scalp explains which ones soothe and which to avoid.
What to Do If You React, and When to Get Professional Advice
Stop using the product at the first sign of a real reaction. Wash the area with mild soap and cool water. Do not scrub. Pat dry and leave it alone.
For mild redness or itching, a cool compress helps. Avoid hot water, fragrances, and other products on the area until it settles. Do not re-test the same product on another spot to "check", a second exposure can make an allergic reaction stronger.
Seek urgent medical help if you have:
- Swelling of the face, lips, or throat
- Trouble breathing or a tight chest
- Widespread hives or dizziness
- Blisters or oozing over a large area
These signs need a doctor, not a home fix.
Who should get advice before testing at all. A home patch test is a reasonable first step for most adults with intact skin. It is a poor first step if you have eczema or psoriasis on the test area, a history of contact allergies to fragrances or essential oils, broken, cracked, or inflamed skin, or a previous severe reaction to any skincare product.
What clinician-led patch testing adds. A dermatologist applies small, measured amounts of individual allergens under occlusion, reads them at set intervals over several days, and can separate a true allergy from irritation.
What a negative home test can and cannot establish. A clear result is useful, but treat it as one signal, not a guarantee. It cannot rule out a reaction from long-term use, a higher dose, a different area of skin, or a different batch of the product.
If you have eczema, psoriasis, or very sensitive skin, ask a pharmacist or dermatologist before testing any new oil. Our guide to soothing an itchy scalp naturally covers gentle steps after a mild reaction, and our roundup of the best scalp oils without synthetic fragrance helps you spot gentler options to patch test next.
Frequently Asked Questions
How do you patch test scalp oil before using it?
Put a small amount of the finished oil on clean skin, usually the inner forearm or inner elbow. Use a cotton swab and apply a thin layer over a small area. Leave it uncovered and check at 15 minutes, then again at 24 and 48 hours. If you see redness, itching, burning or swelling, stop using it and rinse the area with lukewarm water. A patch test scalp oil routine should always use the exact product you plan to apply, not a single ingredient.
How long should you wait after patch testing a hair oil?
Wait at least 24 hours, and ideally 48 hours, before treating the result as clear. Some reactions to botanical oils are delayed and only appear on the second day. Check the test area at 15 minutes for immediate burning or stinging, then again at 24 and 48 hours. If nothing changes after 48 hours, you can move on to a small scalp application, but keep watching for itching or flaking over the next few days.
Can you patch test essential oils directly on your skin?
No. Undiluted essential oil is too concentrated for skin testing and can cause a chemical burn even on people who are not allergic. Dilute it in a carrier oil first, usually at a low concentration, and never undiluted. Better still, test the finished botanical scalp oil you plan to use, because that is the exact blend and concentration your scalp will meet.
Does a patch test guarantee that a scalp oil will not cause a reaction?
No. A patch test lowers your risk but cannot rule out every reaction. It tests a small area of skin, not your scalp, and scalp skin can respond differently under heat, sweat and daily washing. It also cannot predict delayed sensitivity that builds over weeks of use. Stop using the oil and rinse if you notice itching, redness or flaking after full application, and speak to a pharmacist or dermatologist if symptoms persist.
Your scalp deserves the same care you give the rest of your skin. At Oil In One, we make scalp-first hair care with 100% natural ingredients and plain-language labels, so you know exactly what you are testing and why. Our light, non-greasy formulas are built for the local climate and designed to calm itchy, flaky scalps while sealing in moisture. Trusted by 500+ customers, we keep routines simple and honest. Get started with Oil In One and give your roots a routine you can actually understand.
